Friday, June 27, 2014

Daring Bakers: Cinnamon Rolls


This month the Daring Bakers kept our creativity rolling with cinnamon bun inspired treats. Shelley from C Mom Cook dared us to create our own dough and fill it with any filling we wanted to craft tasty rolled treats, cinnamon not required!

It has been forever since I have managed to do a Daring Kitchen challenge, and even longer since I have managed to post about it.  Well looks like Cinnamon rolls were enough to get me out of retirement.  When I first saw the challenge I was pretty sure I was just going to make your standard cinnamon rolls - nothing fancy.  Then I saw all the delicious looking variations and decided on the roasted banana cinnamon rolls with maple glaze. 

They went together very easily - the banana's roast while you are letting the dough rise on top of the stove.  I only had two issues:

1 - My daring twist to this recipe was boiling down the maple syrup.  A friend of mine gave me a jar of syrup from his maple trees - he had boiled it down some but still way too thin.  The only advise I would give to this - is make sure to keep an eye on it.  The syrup boiled all over my stove - lots of fun to clean that up.  The syrup was delicious though :)

2 - My other issue was that I put these together at night and baked them in the morning to bring to work.  Do you have any idea how hard it is to drive 45 minutes to work with fresh cinnamon buns in the car - almost impossible.

I did make it to work without even tasting one and my co-workers appreciated it.  They were gobbled up in short order and got lots of complements.  They were very good - loved the banana - just enough for some good banana flavor without being overwhelming - and the maple glaze added just a hint of maple flavor - a very nice combination.

Hopefully will be back posting more soon.  As always - if you you want to check out this recipe or any of the other great Daring Kitchen challenge recipes check them out here.

Friday, December 27, 2013

Daring Bakers: Whoopie Pies!


The December Daring Bakers' Challenge had us all cheering - the lovely and talented Bourbonnatrix of Bourbonnatrix Bakes was our hostess and challenged us to make fun, delicious and creative whoopie pies! Delicious little cake-like cookies sandwiching luscious filling in any flavors we chose... What else is there to say but "Whoopie!"

I knew there was something I was supposed to be doing last night.  I made the cookies over a week ago and then forgot to write my post in time - Holiday's are a busy time - especially when you are on a new job with no vacation yet :)

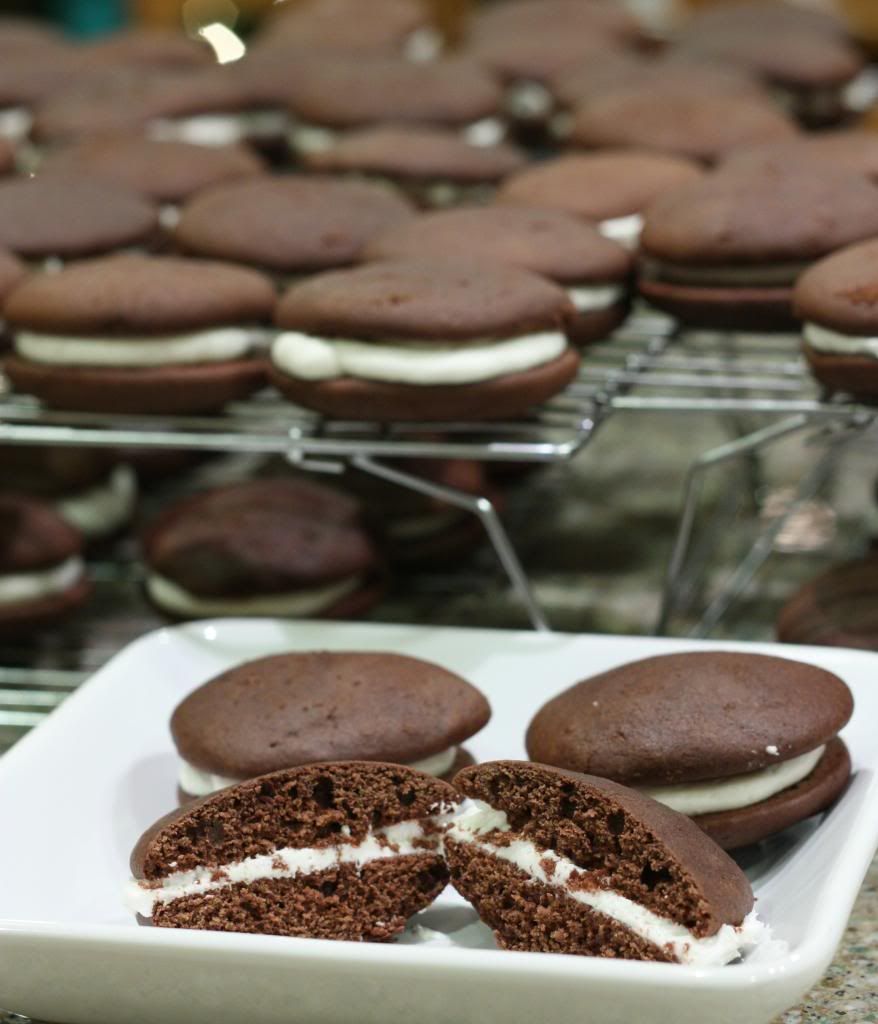
So no creativity here.  I was baking for a cookie exchange so I was thinking more quantity over creativity.  I needed 90 cookies which means I baked four batches which came to around 200 half cookies.  After my first few sets I did run out to grab a small scoop.  Using a spoon was doable but it was much easier with the scoop and I think it made the cookies much more uniform.  

The cookies looked wonderful.  They were mini whoopie pies but still were pretty large for a Christmas cookie.  A full size whoopie pie would be a lot of cookie.  It is hard for me to review these since whoopie pies are not really my favorite cookie.  They were certainly good and if you like whoopie pies these would probably be a good recipe.  For me - I have seen enough whoopie pies to last me a while.


Saturday, December 14, 2013

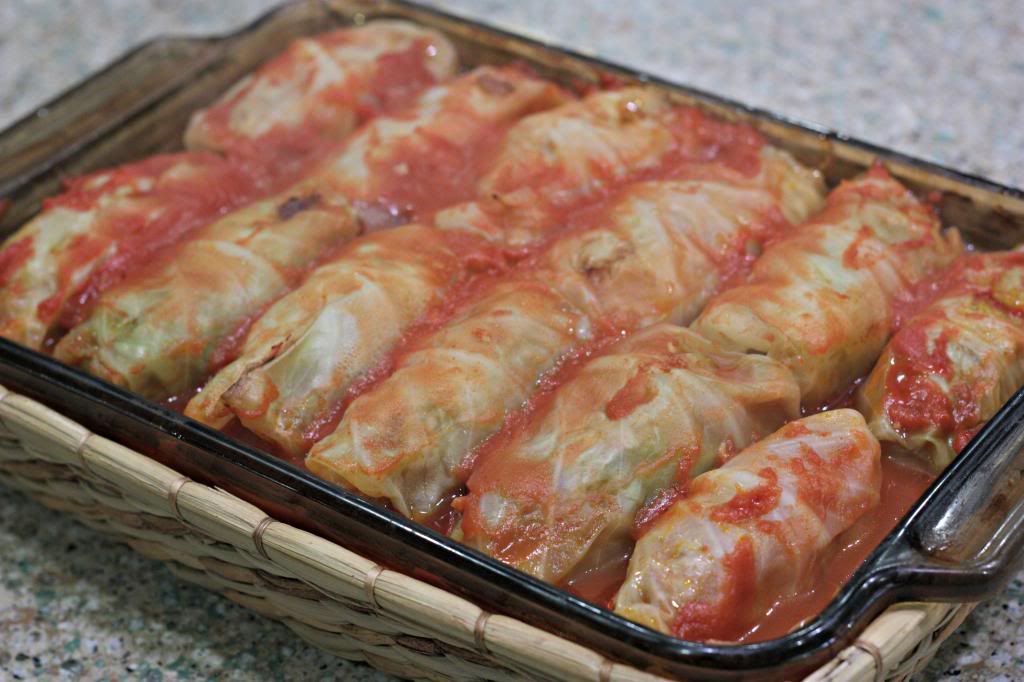
Daring Cooks: Cabbage Rolls


For this months Daring Cook's challenge Olga from Effortnesslessly challenged us to make stuffed cabbage rolls using her Ukrainian heritage to inspire us. Filled with meat, fish or vegetables, flexibility and creativity were the name of the game to get us rolling!

It has been many years since I have had a cabbage roll and I don't know why.  Olga introduced us to some very interesting variations - I didn't even know there was such a thing as a seafood cabbage roll.  I really wanted to try one of these but since it would be my wife and sons first time to try a cabbage roll I figured I should do good old beef this time.

There was nothing hard about making the cabbage rolls but it was several steps and took a couple of hours to complete.  The recipe said it served 8-10 so I decided to cut the recipe in half.  Well even cut in half the recipe made me 20 good sized cabbage rolls - lots of leftovers.  Well it turned out the leftovers were a good thing.  Someone at church just had a baby so we were able to provide them with a nice supper and a few lunches for us.  Everyone enjoyed them - maybe I can get my wife to let me try the seafood version next time.

Friday, November 15, 2013

Tribute to The Queen of All Daring Bakers, Lis

I feel kind of strange as I write this as I have never done anything like this before but it is something I really wanted to do.  Tuesday night after I got home from a social event and found an email waiting for me from someone I didn't know.  That email was to tell me that Lis; one of the founders of The Daring Kitchen website; had passed away earlier that day.  My heart sunk.

I have been a part of the Daring Kitchen; first the bakers and then the cooks; since early 2010.  I had just become a stay at home dad with an infant so the challenges were a great diversion.  I really didn't know much about Lis, her intros to the challenges were always full of energy and humor, but that is all I knew.  That all changed late in 2011.  Lis posted a message that she needed some technical help with the site and I volunteered. 

The past three years I have been much more involved with Lis and the site.  She would email me often with different tasks or questions on the site.  I never really felt that it was a chore.  Lis's emails were always full of humor and she always sounded genuinely grateful for everything I did.  She even sent me several gifts just as a small thank you.  I never asked for anything in return but I know that she always wanted the site to make enough money so that she could pay the people that were helping her out. 

I know I was surprised at how much her death has affected me.  They say this electronic age is making us all have less "real" relationships.  Lis is someone I have never met, never heard her voice, and I don't even know what she looked like.  But in her emails, she would always ask about family, or my job, and she would always talk about some of the things she was going through.  She would complain about some of her health issues, but always kept her humor even in that.  When I heard of her death I didn’t feel as if it was just an electronic relationship.  I had two nights with not much sleep and it felt every bit real.  I have been dealing with some website things and I keep thinking I can just email Lis to ask her.  I see that cookbook she sent me or the product I just reviewed, strange how many things I have to remind me of someone I never met.

I have felt very encourage by all the things people in the group are doing with this.  I am both sad and happy at the same time reading how she has touched so many of the other members.  Many of the members are cooking or doing a challenge in memory of Lis and I only wish I would have had the time to do something like that, but for now this will have to suffice.  I haven’t had much time yet to look at what everyone else has done today but I look forward to reading all of it.


So what about the website.  Like I said, for the past three years I have been the tech guy on the site.  I am the only one other than Lis that even has access to the whole site.  I have to admit, when I was first told the news, I just assumed the website would go away.  I knew Lis did a lot to keep it going and I knew that I did not want to take all that on myself.  Well, now it is starting to become obvious that it is not going to go away.  I have been contacted by several people who don’t want this community Lis helped create to go away, and some have even offered to help :)  Some have even been in contact with Lis’s husband and I am told that he doesn’t want it to end either.  The bottom line is, there are still some hurdles to get over, but we are going to do our best at keeping this thing going.

Monday, October 14, 2013

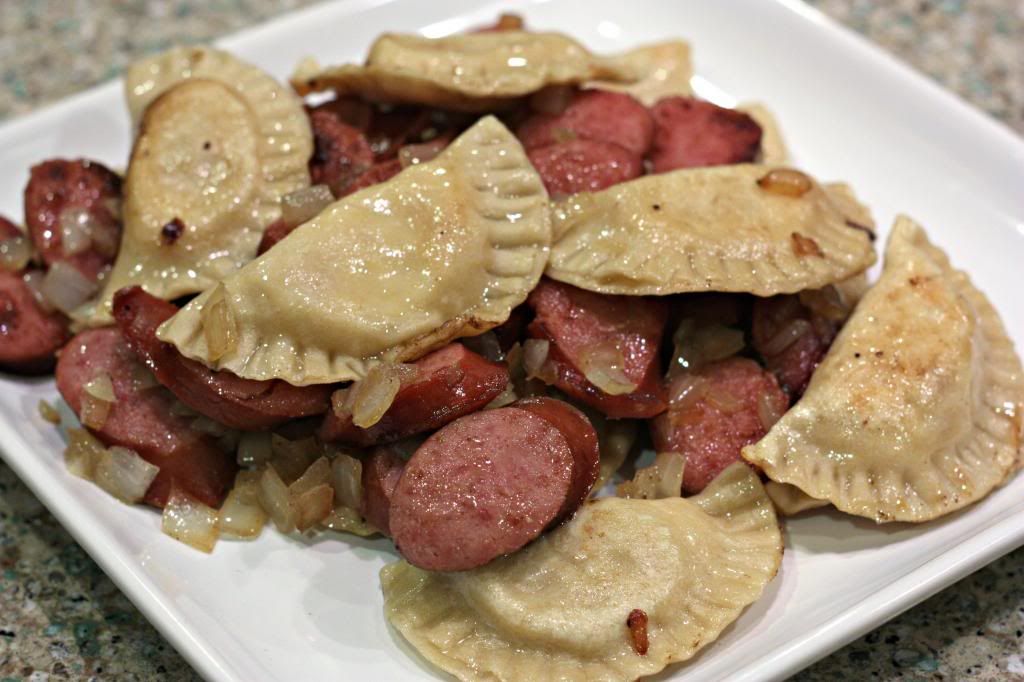
Daring Cooks: Pierogis


In a "celebration" of past Daring Cooks and Daring Bakers challenges, Lisa challenged all of us to search through the Daring Kitchen archives and pick any one we'd like! The REAL challenge was picking which delicious recipe(s) to try!

It really was a challenge to pick one, so many challenges from before I started, and way too many that I missed after I started.  I decided to go all the way back to August 2010 and pick a challenge from Liz of Bits 'n Bites and Anula of Anula's Kitchen - Pierogis.  I have always liked pierogis but have only ever made frozen ones or had them from the local eastern European deli (Kramarczuks - yumm).  Well making my own couldn't be simpler.

I chose to make their recipe for Russian style pierogi.  The recipe said it made four servings.  I ended up with way to much filling for the dough, but a second batch of dough worked out just about perfect for the filling.  It ended up making about 60 pierogis which I think will be enough for 3 meals for 4 people served as a side like this.  I did boil the pierogis (not sure I needed to) and then fried them with a little onion and some polish sausage.

Boy were they good.  The whole family loved them including the one year old and especially the six year old - they were a big hit.  Much better than the frozen ones and I think they have maybe even been better than the local deli with all the bacon I put in.

If you would like the recipe you can check out the full write-up in the daring kitchen archive here.

Friday, September 27, 2013

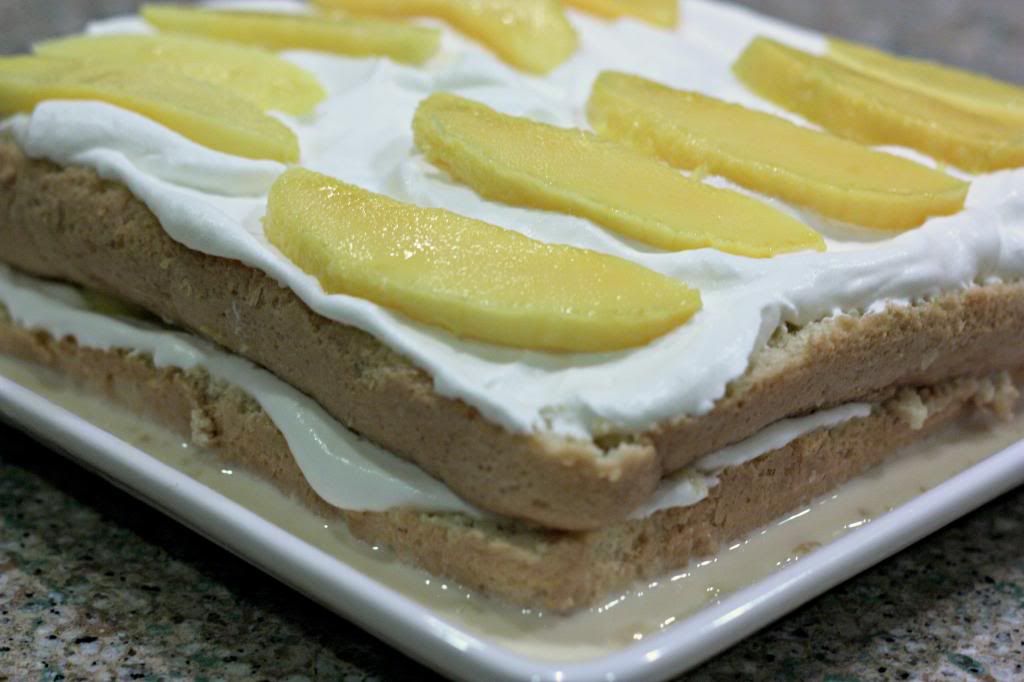
Daring Bakers: Tres Leches Cake


Inma of la Galletika was our Sept. 2013 Daring Bakers’ hostess and WOW did she bring us something decadent and delicious! Pastel de Tres Leches or Three Milk Cake, creamy yet airy, super moist but not soggy.. just plain delish!

Tres Leches cake is something I have had many times, usually at a fancy restaurant, but I have never seen one that looks as incredible as Inma's version.  Any time I have had it, it is a fairly plain affair (not that it is not good plain), but Inma version adds fruit and hers was beautifully decorated.

Inma had a chocolate coconut version of this recipe which sounded incredible, unfortunately I am the only coconut lover in the family so I decided to go for the standard version.  The cake is very easy to make.  The cake is a standard sponge cake, which I sometimes have a little trouble with, but this one came together perfectly.  The tres leche ( or three milk ) sauce was just as easy.  You wouldn't think canned milk could taste so good but combined with a little cream it made a very tasty sauce for the cake.

I have never tres leche with fruit but thought it might go nice with some mango, and I was right.  The cake was really good - as good as any I have had in a restaurant.  I like the cake plain but the mango was a wonderful addition.  The whole family loved the cake as you can see from the picture below :)


Saturday, September 14, 2013

Daring Cooks: Gnocchi


Wow - this is exciting.  This months Daring Cooks challenge was brought to you by ME!  I think a lot of people that host a challenge try to pick some kind of specialty, or a dish that they have a special version of, or at least something connected with their ethnic heritage or something.  Well not me.  I like gnocchi but I haven't actually eaten it too much and I have never made it in my life.

I chose to do a potato gnocchi as the challenge and I started with a lot of research.  Gnocchi is a very simple thing usually having only a few ingredients.  It turns out there are many theories on what makes gnocchi good or bad.  You want your potatoes dry - some people say to bake them - others say boiling is ok - and another theory even said to use old shriveled potatoes (I didn't try that last idea).  Some recipes say to use an egg to hold it together and others say the egg will make it heavy.

Well I kind of chose to focus on the recipes in this NY Time article by Mark Bittman with Mario Batali.  Even the article can not agree because in the video Mario uses an egg and he boils the potatoes, but then the recipe bakes the potatoes and does not use an egg.  I can't really tell you which way is best since I made all of mine with the egg and boiling the potato (if it is good enough for Mario - it is good enough for me).  I can tell you that I definitely don't think the egg made it too heavy.

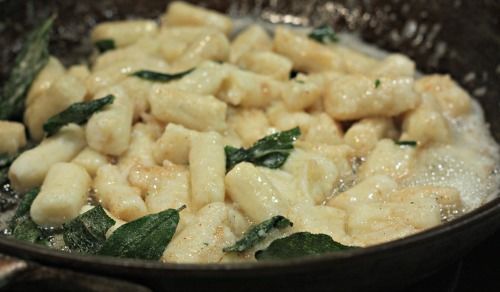
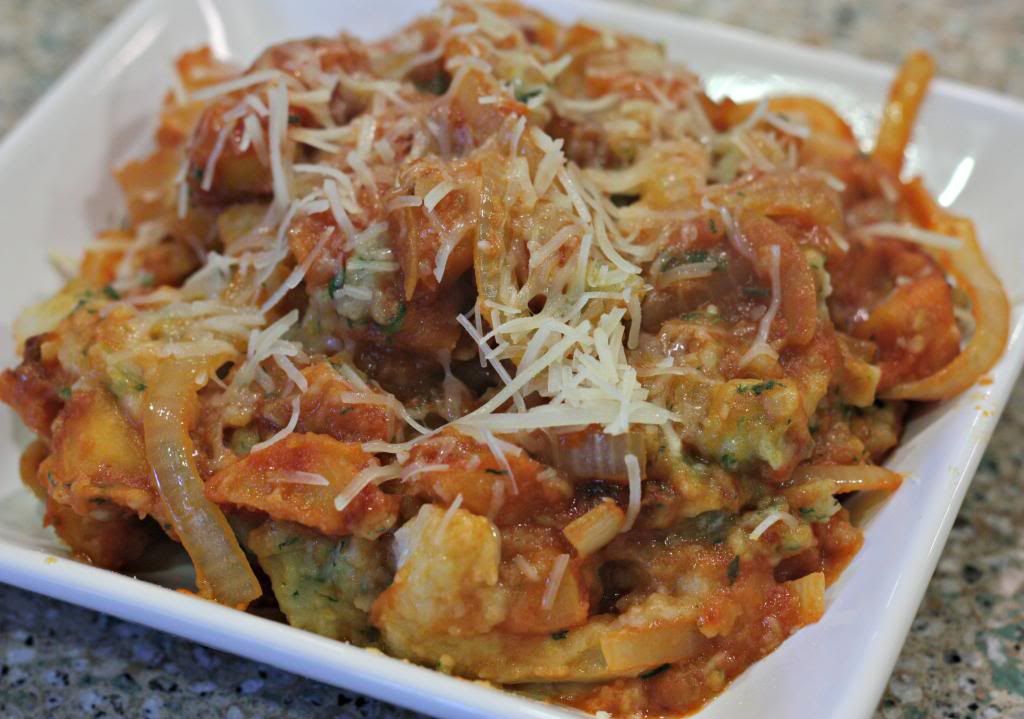
I ended up making several different kinds of gnocchi.  The first I made was a very traditional gnocchi with a Brown butter sage sauce.  This was good but not my favorite, did like the crispy sage though.  I also had definitely not perfected the gnocchi yet and it was almost too tender and started to fall apart in the water while cooking.

The second gnocchi was the gnocchi with butternut squash that Mario makes in the video.  This was probably my favorite of the sauces I made.  Delicious sauce and loved the fried squash.  I still had a little trouble with the gnocchi falling apart to I needed to get to the bottom of that.

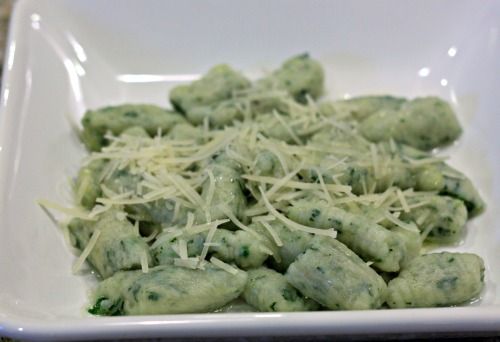
Well for my last gnocchi I made a spinach gnocchi and just topped it with a little olive oil and Parmesan cheese.  I think in my first two tries I was way to scared of adding too much flour since everything said too much flour would make them tough.  Well for this version I added a bit more (the recipe did say it would need more because of the moisture of
the spinach) - my test batch was still falling apart more than I would like so I added more flour and that was it - they came out perfect.  They looked great and didn't fall apart at all.  They were also not tough at all either.  They were probably still more tender than any restaurant gnocchi I have ever had.

I can say the challenge was fun for me and I hope it was fun for everyone else that participated.  As usual people are coming up with some very creative twists on this.  If you would like to check out the full challenge you can find it on the Daring Kitchen recipe archives.

Saturday, July 27, 2013

Daring Bakers: Polvitica


In a "celebration" of past Daring Baker and Daring Cook challenges, Lisa (CEO of The Daring Kitchen) challenged all of us to search through the Daring Kitchen archives and pick any one we'd like! The REAL challenge was picking which delicious recipe(s) to try!

Even if it is kind of a non-challenge - what a great challenge.  I almost went back to last months pie challenge that I missed since I really like pie and I really did not want to miss that one.  Looking back though, I found many challenges that I missed or were before I was a member that I wanted to try.  I have no idea why I didn't do this one the first time around but the Povitica from back in October 2011 really caught my eye. The original challenge was from Jenni of The Gingered Whisk.   Povitica is an Eastern European nut bread with many names depending on what country it came from.  It is a sweet bread and usually served around the holidays.

It is not the holidays now but we had a picnic potluck to go to with a bunch of other international adoption parents.  I thought, what better than an international dessert.  While making the dessert I figured out I was out of white flour.  I ended up using  a "white" whole wheat flout and I don't think it hurt it one bit.  Delicious sweet bread with lots of swirly nut goodness.  It was well received at the potluck and the whole family liked it too.

Thanks to Lisa for the challenge and to Jenni for the original challenge.  Check out the challenge recipe and all the other challenges in the Daring Kitchen archives.

Sunday, July 14, 2013

Daring Cooks: Yogurt


Wow - I haven't managed to post since April - it has been such a busy summer.  Well this months Daring Cooks challenge is something I have always wanted to try - and it turns out it is very easy as well - at least it is not time consuming.

The lovely Cher of The Not So Exciting Adventures of a Dabbler was our July Daring Cooks’ hostess and she asked us to create homemade yogurt in our own kitchens! No incubators needed, no expensive equipment or ingredients, just a few items and we had delicious yogurt for a fraction of the cost and a whole lot healthier than what you buy in the stores!

You might think making yogurt is tricky to do, or that it takes a long time, or that you need to buy some fancy yogurt machine.  Well it turns out none of that is true.  The trickiest part or making yogurt is keeping it warm for 5-12 hours and our host gave us several ideas on how to do this.  I chose to use the warming drawer in my oven and cracked it open just a bit.  I put a thermometer with an alarm on it set to 120F so I would know if it got too warm but it was not an issue.  The temperature barely moved all day, at least not until the warming drawer automatically shut off after 5 hours.  I didn't know it did that, but I caught it fairly quickly so no disasters.

Mine was not thickening much so I did end up leaving mine warm for 12 full hours.  Even after this time it was still very runny but I decided to  try it out.  I put it in the fridge to see if it would thicken up more in the fridge.  It might have thickened a little more but it was still very thin. 

I was worried the thin consistency meant that my culture was bad.  I used a store-bought local brand yogurt as my culture so I wasn't really sure how it would work.  Turns out the consistency was no indication of the taste.  It tasted just like I would expect - nice and tangy.  I actually like the runny texture - just not what I was expecting.  Will definitely try this again now that I know how easy it is.

If you would like to try to making yogurt yourself check out the recipe in the Daring Kitchen recipe archive.

Sunday, April 14, 2013

Daring Cooks: Chicken Ballotine


For the April Daring Cooks Challenge, Lisa from Parsley, Sage and Sweethas challenged us to de-bone a whole chicken, using this video by Jacques Pepin as our guide; then stuff it, tie it and roast it, to create a Chicken Ballotine.
A Ballotine is one of those things that I had heard about before and just always thought it was one of those insanely difficult things that chefs do to show how talented they are.  I never really thought it was something I would ever do.  Well, I was wrong.  Turns out it is not really that difficult and it makes a pretty delicious chicken.  Some definitions of Ballotine say that it is a de-boned leg but in this challenge we de-bone a whole chicken while essentially leaving it a one piece. 
Instead of going through this step by step with lots of pictures Lisa made the wise decision to make this a video challenge.  Jacques Pepin  has a ten minute video that you can see here that shows the whole process.  In the video I think he says that it should take 5-10 minutes to de-bone a whole chicken.  I think it took me about a half hour but a lot of that time was spent watching the video over and over to make sure I was doing it correctly.  I can honestly say that I think it would take less than ten minutes the next time.  I was very surprised at how easy it was and how little knife-work there was to the whole process.
The nice part of the de-boned chicken is that it gives you a nice big piece of uniform meat that is great for stuffing.  I stuffed mine with a mixture of spinach, bread, and mozzarella cheese.  The video also gives a very nice demonstration of trussing the stuffed chicken.  I also made the sauce/gravy that Lisa gave us the recipe for.
The chicken was fabulous.  It looked very elegant and would be a great recipe for entertaining.  It also tasted great.  I loved the stuffing and couldn't get enough of the sauce.  Now if I ever decide I want to make a Turducken for Thanksgiving I will have the major technique figured out.

Thursday, March 14, 2013

Daring Cooks: Let's Get Cheesy


Last months challenge was to make cured meat or sausages and it was kind of unique in that it we actually had "winners" of the challenge.  Well I am very excited that I won with my sausages and just received my prize - a copy of Salumi: The Craft of Italian Dry Curing by Michael Ruhlman.  It looks like a beautiful book and some day I will manage to try some of the cured meats in there.  If you want to check out the sausages I made you can see them here.

Now on to this month.  Sawsan from chef in disguise was our March 2013 Daring Cooks hostess! Sawsan challenges us to make our own homemade cheeses! She gave us a variety of choices to make, all of them easily accomplished and delicious!

Just a month or two ago Lis (Founder of The Daring Kitchen) asked me if I wanted to host a challenge.  Well I had just bought a book on cheese-making and wanted to try a bunch of them out so I told her I would do a challenge on cheese-making.  Well, surprise-surprise, someone was already doing cheese-making next month.  I was very excited.  You will just have to wait until later this year to see what I come up with for my challenge :)

There were so many cheeses I wanted to try from my book but I had to restrain myself some.  For one thing I was taking a 10 day vacation in March so I would have a short month.  Also, many of the cheeses I wanted to try were more difficult so I forced myself to start with some simple to intermediate cheeses.  I settled on a ricotta and a mozzarella.  The ricotta is considered an easy cheese and mozzarella would be an intermediate cheese.  

For some reason I decided to start with the harder of the two, the mozzarella.  I was going to make two batches.  I bought all my supplies at a local home-brewing supply store.  The quality of the milk can matter a lot for cheese but I decided to use just grocery store pasteurized / homogenized whole milk.  My first batch was kind of a disaster.  It didn't really clump together properly and then to make matters worse I managed to over-salt it.

Good thing I was planning to make two batches - at least I could get one.  For the second I watched some online videos to see what everything was supposed to look like so I would know what I was doing a little more.  Well the second batch was much better.  The mozzarella was not the easiest.     The recipes have two very exact temps to hit and maintain - not sure how exact it really has to be but I didn't want to test it too much.  The mozzarella also needs to be melted and stretched - this is a messy job.  In the end it looked and tasted like fresh mozzarella though so I was happy.

The ricotta was much easier.  You just add an acid to milk and heat it - ten drain in some cheese cloth.  Both cheeses gave me about a pound from a gallon of milk - I was kind of amazed you could get that much solid cheese from a gallon of liquid.

I ended up making some lasagna from the result.  I had never used fresh mozzarella in a lasagna but I just sliced the cheese instead of shredding it and it worked great.  Taste-wise the lasagna was much richer, mostly from the ricotta I think.  I am not really sure if it was because the ricotta was fresh or just that it was a very high fat ricotta where I would normally use a part-skim ricotta in my lasagna.

I really enjoyed the challenge and look forward to trying some of the more advanced cheeses in the book I bought.  If you are interested all the recipes I used were from that book - Artisan Cheese Making at Home: Techniques & Recipes for Mastering World-Class Cheeses.


Thursday, February 14, 2013

Daring Cooks: Let's make Sausage


For the January-February 2013 Daring Cooks’ Challenge, Carol, one of our talented non-blogging members and Jenni, one of our talented bloggers who writes The Gingered Whisk, have challenged us to make homemade sausage and/or cured, dried meats in celebration of the release of the book Salumi: The Craft of Italian Dry Curing by Michael Ruhlman and Brian Polcyn! We were given two months for this challenge and the opportunity to make delicious Salumi in our own kitchens!

I have been wanting to try my hand at sausage making for a while.  I actually asked for a sausage making attachment for Christmas and received one from my lovely wife so the timing of this challenge was perfect.  My wife also got me another gift that I used for this challenge, but more about that later.  There were a few things I wanted to try for this challenge so I was glad to hear we were allowed two months instead of our normal one month.

I started out making a simple polish sausage.  I made this using a little bit different technique.  I brined a pork shoulder along with a little extra pork fat in a salt, sugar, and garlic brine overnight.  When it came time to make the sausage I just added a little marjoram and a little more garlic.  I fried up a little patty to test it out and it was great.  My wife is not a sausage lover but she even liked it.  I think it had lots of flavor but a pretty simple sausage.

I was a little worried about the sausage stuffing but it wasn't too bad.  I used natural casings and used the instructions provided by Carol and Jenni for stuffing.  The casings were actually kind of fun to work with - like a big long balloon.  I only had them burst once and that was near the end anyway so no big deal.  I was using the KitchenAid attachment and I did have a little but of trouble with it getting big air pockets forced through.  I just went slow and kept a pin handy to poke some holes.  It was not a fast process but I was very happy with the final result.

Here is where that other Christmas gift came into play.  My wife also got me a very nice Masterbuilt Electric smoker.  I normally prefer fresh sausages but I thought I should take the opportunity to try smoking a portion of the sausages.  I used apple wood and smoked them at 160 degrees F for about 4.5 hours.  

Next I decided to create my own sausage.  I decided to make a buffalo chicken sausage ( named for Buffalo Wings - not Buffalo :) ).  Here is my recipe:

Grind 1.5 lb fatty pork (I used pork sholder mixed with some extra fat) and 1.5 lb chicken thigh meat.
Add 1/2 c Frank's Hot sauce and allow to marinate for a few hours.
Mix in :
3 stalks celery finely chopped
1/2 lb blue cheese crumbled
1/2 c beer

I then stuffed them into the hog casings.  I did have a little more trouble with stuffing the chicken sausage.  The celery would clog up the KitchenAid attachment so I kind of did it by hand.  Took a little longer but it worked.

I ended up cooking these right in the middle of Winter Storm Nemo and decided to grill them.  Nemo did not hit Minnesota too bad, but not a day I would normally be grilling on.  I was very happy with the results.  Can't say they were the best sausages ever, but pretty good for a first attempt.  My favorite would have to be the Buffalo Chicken - less spicy than I thought they would be but nice flavor with the hot sauce and blue cheese mixed in.  The smoked sausages came out a little dry - must have smoked them a little too long.

Very fun challenge - can't wait for the next one!


P.S.  I mentioned last month I was going to be doing the polar plunge.  Well my five year old son decided to join me.  We raised a total of $462 for Special Olympics MN.  That's us in the back and you can probably tell from the look on our faces it was very cold.


Sunday, January 27, 2013

Daring Bakers: Gevulde Speculaas


Francijn of Koken in de Brouwerij was our January 2013 Daring Bakers’ Hostess and she challenged us to make the traditional Dutch pastry, Gevulde Speculaas from scratch! That includes making our own spice mix, almond paste and dough! Delicious!

I have worked with several people from the Netherlands and have even gone to a Dutch themed tulip festival in nearby Pella, Iowa and one thing I have learned is that the Dutch know their treats.  If you don't believe me just try a stroopwafel if you ever get the chance.

In this months challenge Francijn (from the Netherlands) starts out teaching us some Dutch history and all about the spice trade.  The bakers guilds in the Netherlands would create secret spice mixtures and one still used today is known as Speculaas.  It seems like everyone makes it differently (similar to a curry mix) but Francijn gave us some good guidelines to create our very own Speculaas mix.

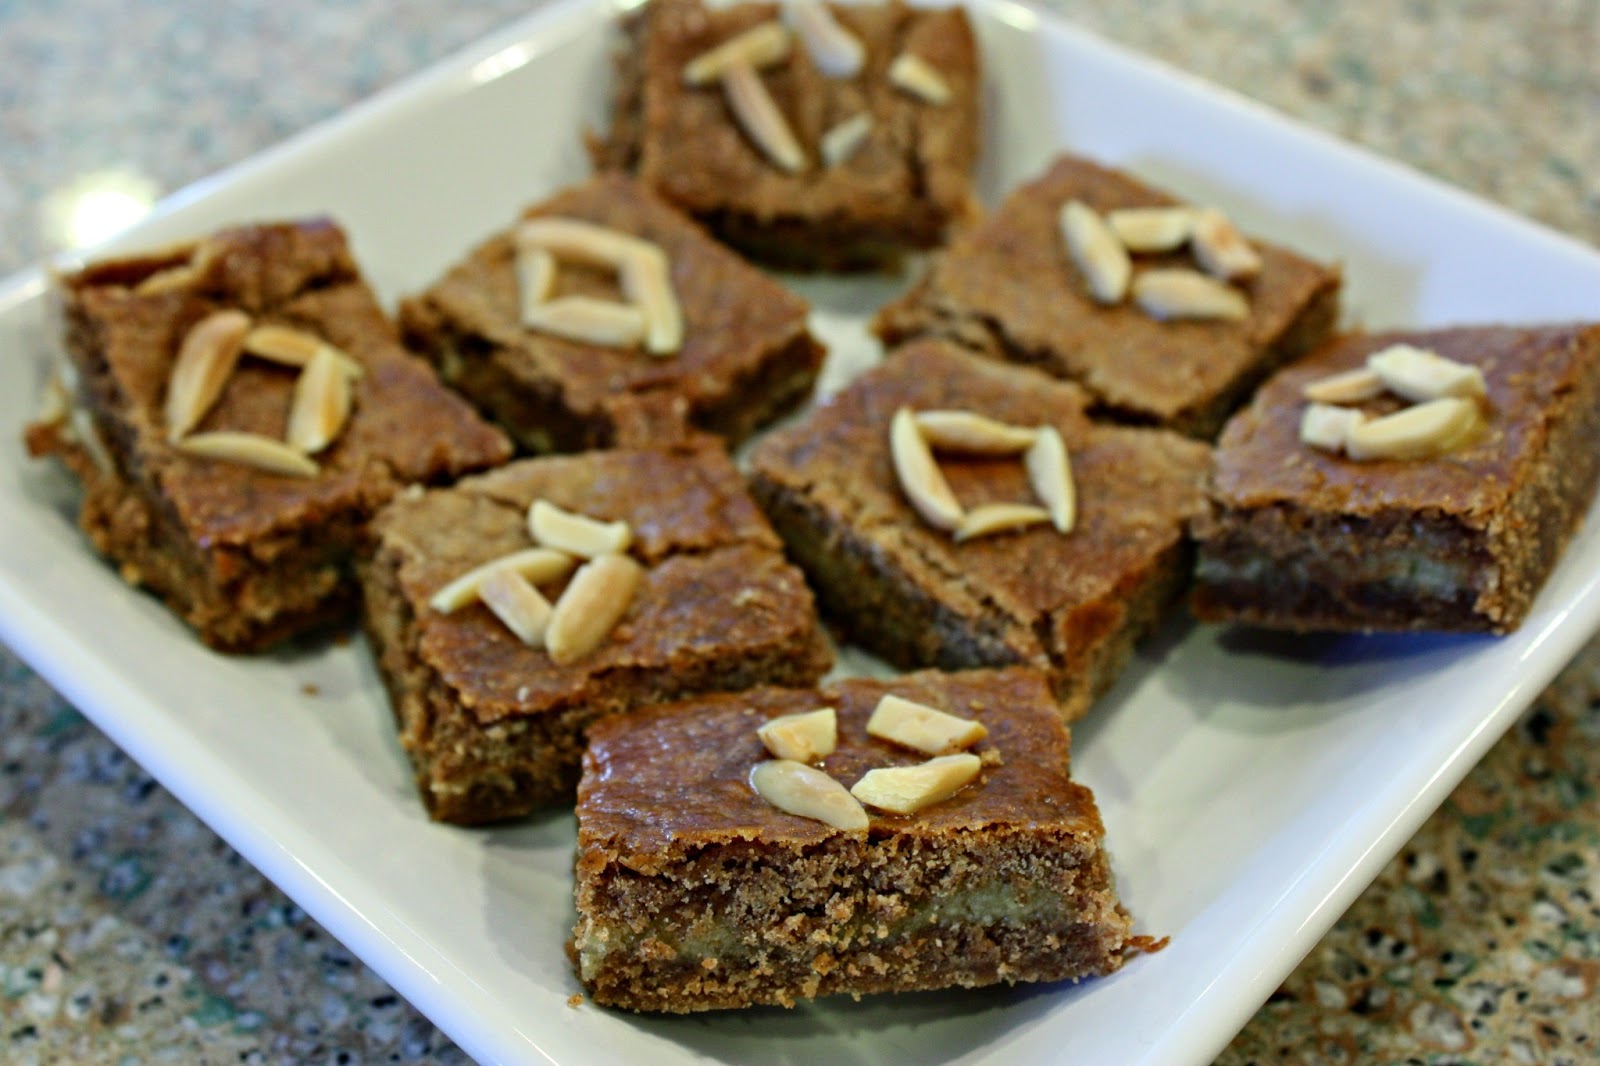
We also created our own Almond paste and put it all together to make Gevulde Speculaas (or stuffed Speculaas).  When I put this together it did not go together quite as nice as in Francijn's pictures.  There was no way I could get the rolled dough into a pan in one piece.  The good news is that it didn't really seem to matter - I was able to kind of press it together in the pan and after it baked no one would ever know.

The combination of scents  and flavors was amazing.  Lucky this even made it until it was fully baked because it smelled so good in the oven.  I did taste it before it got too cool and it was delicious warm.  Nice and soft with the warm flavors of the spices and the nice sweet almond filling.  Definitely a recipe I will keep for the future - might be something nice to make at Christmas time.  If you would like to try out this recipe you can find it in the Daring Kitchen Archives - join us!

I normally send a bunch of the treats I make to my wife's work so I don't end up eating the entire pan (not that I couldn't do that).  Well this time was a little different.  I live in MN and for those of you that don't know MN gets pretty cold (a few days I woke to -17F or -27C).  One of the crazy things people do here is called the Polar Bear Plunge and this year I decided to do it.  In about two weeks they will be cutting a hole in the ice at a local lake and I will be jumping into it.  It is all for a good cause - we are taking pledges to support Special Olympics MN.  Well I turned my Gevulde Speculaas into a bit of a mini bake sale at my wife's work and took donations for my polar plunge.  I ended up getting $36 in donations.

If you are interested click on the link below.  If it is before Feb 9 it will let you pledge to support Special Olympics MN in my name.  After that date I think it is going to show a picture of how I look after jumping into freezing water - should be interesting.


Thursday, December 27, 2012

Daring Bakers: Panettone


The December 2012 Daring Bakers’ challenge was hosted by the talented Marcellina of Marcellina in Cucina. Marcellina challenged us to create our own custom Panettone, a traditional Italian holiday bread!

I always love the December challenge.  The December challenge always seems to be some traditional Christmas treat and this months challenge did not let me down.  There are probably more variations of a Christmas bread than there are countries and this one comes from Italy.

I started out making the candied orange peels.  I have done this many times now - two years ago for the Daring Bakers Christmas Stollen.  The bread was not difficult but it did take some time.  When you start reading a recipe and it contains seven sub-recipes (sponge, first-dough, second-dough, final dough, candied orange peels, and glaze) and some of the steps have multiple risings; you know it is going to take some time.

The other complication to the recipe is that is traditional cooked in a special paper "pan".  I wasn't sure of a local source and I was too cheap to pay $5 for shipping on a few sheets of paper so I followed Marcellina instructions for making your own.  It was a little bit of a pain and the papers did not look pretty for displaying the finished product, but it worked.

I ended up cooking my bread for 10 minutes longer than the recipe called for and it still came out a bit doughy.  I am cooking a second loaf now and will go even longer on this one.  I also think I followed the recipe by not really mixing the filling in much so the filling was kind of in pockets.  I notice a lot of the other pictures that people have posted show the filing more evenly distributed.  Not really sure which way is "right" - it was good with the pockets of filling but i am sure it would be good with the filling more even too.

I also used double the orange peel like Marcellina suggested as candied citron is expensive.  I made a glaze for mine but didn't follow the recipe.  Some of my family doesn't like the almond so I just made a similar glaze without the almond flour and added a little orange essence.

Even though the center was a little doughy it was still very good and it was a big hit on Christmas morning.  A nice sweet moist bread with a delicious filling.  Thanks for sharing these recipes Marcellina.

Friday, December 14, 2012

Daring Cooks: Shepard's Pie


Our Daring Cooks’ December 2012 Hostess is Andy of Today’s the Day and Today’s the Day I Cook! Andy is sharing with us a traditional French Canadian classic the Paté Chinois, also known as Shepherd’s pie for many of us, and if one dish says comfort food.. this one is it!

Everything sounds delicious in French - doesn't it.  Well the first recipe Andy gave us for Paté Chinois was his family recipe and was very similar to the quick Shepard's pie that I regularly make for a weeknight supper.  It has ground beef, mash potatoes. canned or frozen vegetables.  Well, it seems like Paté Chinois is not quite the same.  It also has a little French Canadian twist,  red wine and creamed corn.  Not sure I have ever seen a recipe with red wine and creamed corn together.

My wife is not a big creamed corn fan so I decided to go with a more tradition Shepard's Pie.  Andy also gave us a recipe for a crock pot Shepard's pie made with lamb and beer.  Since I have never made a "real" Shepard's pie I decided to try this one.

I picked us a nice leg of lamb, unfortunately it was 5 1/2 pounds, about twice as big as I needed.  I decided to take a gamble that we would like it and just make a double batch.  I have a pretty large crock pot so I figured no problem.  Well as I started to put it together and mix all the vegetables and meat, I did not even have a bowl big enough to hold it all.  It definitely would not fit in my crock pot so I pulled out the dutch oven.  It barely fit in my large dutch oven.  The recipe called for 10 hours on low in the crock pot so I cooked mine for 3 hours at 325°F.

I froze about half of the cooked Shepard's pie.  I will be able to just make some potatoes and warm it all up to have it later.  The gamble payed off, because it was yummy.  I (and the rest of the family) will have no problem eating this again.  The meat was very tender and tasty and I pretty much licked the sauce off my plate.  The potatoes are cooked right with everything else so they come out a little brown - maybe don't look the best, but they get all that flavor from cooking with the other veggies and meat.  The only change I might make in the future is to brown the meat on the stove - I think that might add a little color and flavor to the meat.

If you want to check out this recipe or any of the other Shepard's pie recipes Andy gave us they are all posted on The Daring Kitchen recipe archive ( look for Paté Chinois ).


Wednesday, November 14, 2012

Daring Cooks: Brining and Roasting


Audax of Audax Artifax was our November 2012 Daring Cooks’ host. Audax has brought us into the world of brining and roasting, where we brined meat and vegetables and roasted them afterwards for a delicious meal!

This months challenge comes about a month early for us in the USA.  Thanksgiving is just a few weeks away and I will be doing lots cooking on that day - including a brined and roasted turkey.  I am not really complaining though, you can't go wrong with a roast chicken any day of the week.  

I have done this many times but Audax puts flavorings in the brine, while I normally put my garlic and other flavorings under the skin.  I added some garlic and sprigs of thyme to the brine.  For veggies I used potato, sweet potato, cauliflower, and onions.  

The chicken came out wonderful.  Not sure if I will change my method though.  Hard to tell without a side-by-side comparison but I think the under the skin method adds more flavoring.  I have only used brining with poultry but Audax discusses using it with other meats, seafood, and even nuts and seeds.  I will have to experiment a little more.

Saturday, October 27, 2012

Daring Bakers: Mille-feuille


Our October 2012 Daring Bakers’ challenge was hosted by Suz of Serenely Full. Suz challenged us to not only tackle buttery and flaky puff pastry, but then take it step further and create a sinfully delicious Mille Feuille dessert with it!

You know when you can't pronounce the name of a dessert then it is going to be good.  This Mille-feuille is no exception.  These are also known as Napoleons.

The dessert takes a little while to make but it is not very hard to make and looks very elegant.  The first step is making the puff pastry.  I have made puff pastry before so this was not very different.  The key to puff pastry is all the layers of dough and butter.  It sounds difficult - but isn't.  It does take at least several hours though as there is lots of time in the refrigerator.

The next step is making the pastry cream.  A little stirring but easy to make.  I don't think mine quite thickened enough but not sure.  It oozed a little more than I expected but hard to know - it could be right.  It was good either way.

The pastry and pastry cream get layered together - then comes the tricky part.  You make a royal icing and melt some chocolate for the top and then you need to work quickly.  You quick put the royal icing on, then a thin stream of chocolate, then you use a knife to make the pattern in the top.  You need to do this all in kind of one step since the icing and chocolate both start to set up.  Mine went pretty well.  I used a plastic bag to stream the chocolate on and I cut the hole in the bag a little big so the chocolate was a little wider than desired - but it still looked ok to me.

The hardest part of the whole thing was cutting it after everything had set-up.  The chocolate doesn't really want to cut and the pastry cream wants to ooze.  It came out nice though and tasted delicious.  Nice and flakey pastry and the pastry cream was yummy.  I only wish this was next months recipe since it would work great for the progressive dinner I need to make dessert for.  I'm sure there will be something equally yummy though :)


Thursday, September 27, 2012

Daring Cooks: Empanadas


Patri of the blog, Asi Son Los Cosas, was our September 2012 Daring Bakers’ hostess and she decided to tempt us with one of her family’s favorite recipes for Empanadas! We were given two dough recipes to choose from and encouraged to fill our Empanadas as creatively as we wished!

I have been very busy as of late and I notice that I have missed at least two challenges.  Well time to get back into it.  I will post a picture at the end of the post of what has been keeping me so busy this past month.

When I first heard that we were making Empanadas I thought of small pies that you can pick up and eat filled with beef.  The Empanadas that Patri showed us were a bit different than that.  For one it was much larger - not a single serving size like I was used to.  She also introduced us to many different fillings - some with fish, ham, or beef.

I decided to make a beef filling since I knew that is what my family would like.  I used Patri's recipe but I left out the peppers and added some corn I had.  I also sprinkled about a cup of shredded cheddar cheese over the filling before I put the top on.

It was all very simple to make.  The crust was a yeast crust but only needed one rising.  I rolled it out about as thin as I thought I could without tearing it putting it together.  I think the thickness was perfect - just enough and on the edges where you fold it over you get a nice little extra "bready-ness".  The whole family loved it and asked for seconds.

As always,  if you are interested in this recipe or any of the Daring Kitchen recipes then check out the Daring Kitchen recipe archive here.

At the beginning I promised to show you what has been keeping me busy.  Well I am now a Cooking Dad x 2.  This is Evan.  He has been a great addition to our family but not always a lot of time for cooking right now.


Friday, July 27, 2012

Daring Bakers: Crackers


Our July 2012 Daring Bakers’ Host was Dana McFarland and she challenged us to make homemade crackers! Dana showed us some techniques for making crackers and encouraged to use our creativity to make each cracker our own by using ingredients we love.

Dana gave us several recipes for Crackers and they all looked so good I decided to try all four of them.  I served them at my son's fifth birthday party / picnic and they were a big hit.  It seems like if you tell most people you are making crackers they assume is is something hard - well that could not be further from the truth.  I just made a half batch of each of these and they were all very easy to put together.  In the picture they are from front and clockwise: 1-Cheddar, Rosemary, and Walnut Icebox Crackers, 2-Pepper Jack and Oregano Crackers, 3-Health Crackers, and 4-Seedy Crisps.  I'll just leave you with a few comments on each:

Health Crackers - I used some wheat bran instead of the wheat germ that was called for.  These were hand rolled and I just cut them with a pizza cutter to make nice little squares.  Except for the fact that I salted them a little too much these were very good crackers and they looked like "real crackers" as well.  

Seedy Crisps - Another good one and probably could be called a health cracker too.  I used the pasta maker to roll these because I wanted to try that but it is not really necessary.  Pasta dough is very stiff and hard to get thin; this is not the case with these cracker doughs.  The pasta roller did make them nice and thin and uniform though and I thought these also came out very nice looking.

Pepper Jack and Oregano Crackers - enough of the healthy stuff.  I decided to make this recipe with the pasta roller as well and it was probably a mistake.  The dough was very wet and it would stretch and break a lot in the pasta roller.  I think maybe because of this the dough became a little over-worked and the crackers were not quite as delicate as I would have liked.  Even with that these were my favorite for flavor and they almost looked like a real ritz type cracker.

Cheddar, Rosemary, and Walnut Icebox Crackers - The last type of cracker was a refrigerator cracker.  You just create a log with the dough and slice them off - very simple, very easy.  These weren't really the best looking and they crumbled a lot when eating them but they tasted good.  Nice and buttery and the flavor of rosemary and walnuts was very good.

If you want to try making your own crackers check out the recipes at the Daring Kitchen Recipe Archive.

Wednesday, June 27, 2012

Daring Bakers: Battenberg Cake


This month Mandy of What The Fruitcake?! challenged us to make a  Battenberg Cake. She highlighted Mary Berry’s techniques and recipes to allow us to create this unique little cake with ease.  Well that was the idea anyway - mine was not exactly created with ease.

The first thing you might want to know is what is a Battenberg Cake?  I know I had no idea.  Well Mandy tells us this about the origins of the Battenberg Cake:

The first Battenberg cake was made to celebrate the marriage of Queen Victoria’s granddaughter, Princess Victoria, to husband Prince Louis of Battenberg. It’s traditionally flavored with almond and has the signature Battenberg markings, that is, the yellow and pink squares (said to represent the four princes of Battenberg).

Well Mandy's cakes looked gorgeous and I had high hopes of doing the same.  I had never worked with the marzipan that covers the cake before but I have done fondant cakes which are similar.  My first mistake was waiting too long.  I waited until two days before it was supposed to be done to try making the marzipan.  I tried doing a cooked marzipan recipe that Mandy provided for us.  It seemed easy enough but even when I had added all the liquid that it told us we might not need - the marzipan was still a crumbly, oily mess.

Well I posted on The Daring Kitchen website about my issues and Mandy came to the rescue.  She said I could just blend in a little more water, and if it got too wet I could add some more confectioners sugar.  I added the water and sure enough, I think I added too much.  Problem number 2 - I just ran out of confectioners sugar and I only have two hours before I have to get this done.  Quick cook the cake - no problems there.

Back to the marzipan.  I decided to make my own confectioners sugar.  I put a bunch of sugar in my food processor and process away.  Well I don't seem to be able to get it quite fine enough but I decide to use it anyway to help thicken the marzipan.  The marzipan gets better but I am sure it still wasn't right.  Just not firm enough to work with and it decides to stretch and tear when I try to cover the cake.
 
As for the results.  You can see from the picture it is not spectacular looking.  The marzipan is sagging and probably too thick.  The cake was marvelous - came out perfectly.  The marzipan tasted fabulous - just a tiny bit gritty from too course sugar I used.

This was a fun challenge but I sure need to allow myself more time for this kind of challenge.  I will definitely be taking another shot at marzipan sometime in the future.  If you would like to try making a Battenberg cake you can find the recipe I used along with others at The Daring Kitchen recipe archive.