Saturday, July 27, 2013

Daring Bakers: Polvitica


In a "celebration" of past Daring Baker and Daring Cook challenges, Lisa (CEO of The Daring Kitchen) challenged all of us to search through the Daring Kitchen archives and pick any one we'd like! The REAL challenge was picking which delicious recipe(s) to try!

Even if it is kind of a non-challenge - what a great challenge.  I almost went back to last months pie challenge that I missed since I really like pie and I really did not want to miss that one.  Looking back though, I found many challenges that I missed or were before I was a member that I wanted to try.  I have no idea why I didn't do this one the first time around but the Povitica from back in October 2011 really caught my eye. The original challenge was from Jenni of The Gingered Whisk.   Povitica is an Eastern European nut bread with many names depending on what country it came from.  It is a sweet bread and usually served around the holidays.

It is not the holidays now but we had a picnic potluck to go to with a bunch of other international adoption parents.  I thought, what better than an international dessert.  While making the dessert I figured out I was out of white flour.  I ended up using  a "white" whole wheat flout and I don't think it hurt it one bit.  Delicious sweet bread with lots of swirly nut goodness.  It was well received at the potluck and the whole family liked it too.

Thanks to Lisa for the challenge and to Jenni for the original challenge.  Check out the challenge recipe and all the other challenges in the Daring Kitchen archives.

Sunday, July 14, 2013

Daring Cooks: Yogurt


Wow - I haven't managed to post since April - it has been such a busy summer.  Well this months Daring Cooks challenge is something I have always wanted to try - and it turns out it is very easy as well - at least it is not time consuming.

The lovely Cher of The Not So Exciting Adventures of a Dabbler was our July Daring Cooks’ hostess and she asked us to create homemade yogurt in our own kitchens! No incubators needed, no expensive equipment or ingredients, just a few items and we had delicious yogurt for a fraction of the cost and a whole lot healthier than what you buy in the stores!

You might think making yogurt is tricky to do, or that it takes a long time, or that you need to buy some fancy yogurt machine.  Well it turns out none of that is true.  The trickiest part or making yogurt is keeping it warm for 5-12 hours and our host gave us several ideas on how to do this.  I chose to use the warming drawer in my oven and cracked it open just a bit.  I put a thermometer with an alarm on it set to 120F so I would know if it got too warm but it was not an issue.  The temperature barely moved all day, at least not until the warming drawer automatically shut off after 5 hours.  I didn't know it did that, but I caught it fairly quickly so no disasters.

Mine was not thickening much so I did end up leaving mine warm for 12 full hours.  Even after this time it was still very runny but I decided to  try it out.  I put it in the fridge to see if it would thicken up more in the fridge.  It might have thickened a little more but it was still very thin. 

I was worried the thin consistency meant that my culture was bad.  I used a store-bought local brand yogurt as my culture so I wasn't really sure how it would work.  Turns out the consistency was no indication of the taste.  It tasted just like I would expect - nice and tangy.  I actually like the runny texture - just not what I was expecting.  Will definitely try this again now that I know how easy it is.

If you would like to try to making yogurt yourself check out the recipe in the Daring Kitchen recipe archive.

Sunday, April 14, 2013

Daring Cooks: Chicken Ballotine


For the April Daring Cooks Challenge, Lisa from Parsley, Sage and Sweethas challenged us to de-bone a whole chicken, using this video by Jacques Pepin as our guide; then stuff it, tie it and roast it, to create a Chicken Ballotine.
A Ballotine is one of those things that I had heard about before and just always thought it was one of those insanely difficult things that chefs do to show how talented they are.  I never really thought it was something I would ever do.  Well, I was wrong.  Turns out it is not really that difficult and it makes a pretty delicious chicken.  Some definitions of Ballotine say that it is a de-boned leg but in this challenge we de-bone a whole chicken while essentially leaving it a one piece. 
Instead of going through this step by step with lots of pictures Lisa made the wise decision to make this a video challenge.  Jacques Pepin  has a ten minute video that you can see here that shows the whole process.  In the video I think he says that it should take 5-10 minutes to de-bone a whole chicken.  I think it took me about a half hour but a lot of that time was spent watching the video over and over to make sure I was doing it correctly.  I can honestly say that I think it would take less than ten minutes the next time.  I was very surprised at how easy it was and how little knife-work there was to the whole process.
The nice part of the de-boned chicken is that it gives you a nice big piece of uniform meat that is great for stuffing.  I stuffed mine with a mixture of spinach, bread, and mozzarella cheese.  The video also gives a very nice demonstration of trussing the stuffed chicken.  I also made the sauce/gravy that Lisa gave us the recipe for.
The chicken was fabulous.  It looked very elegant and would be a great recipe for entertaining.  It also tasted great.  I loved the stuffing and couldn't get enough of the sauce.  Now if I ever decide I want to make a Turducken for Thanksgiving I will have the major technique figured out.

Thursday, March 14, 2013

Daring Cooks: Let's Get Cheesy


Last months challenge was to make cured meat or sausages and it was kind of unique in that it we actually had "winners" of the challenge.  Well I am very excited that I won with my sausages and just received my prize - a copy of Salumi: The Craft of Italian Dry Curing by Michael Ruhlman.  It looks like a beautiful book and some day I will manage to try some of the cured meats in there.  If you want to check out the sausages I made you can see them here.

Now on to this month.  Sawsan from chef in disguise was our March 2013 Daring Cooks hostess! Sawsan challenges us to make our own homemade cheeses! She gave us a variety of choices to make, all of them easily accomplished and delicious!

Just a month or two ago Lis (Founder of The Daring Kitchen) asked me if I wanted to host a challenge.  Well I had just bought a book on cheese-making and wanted to try a bunch of them out so I told her I would do a challenge on cheese-making.  Well, surprise-surprise, someone was already doing cheese-making next month.  I was very excited.  You will just have to wait until later this year to see what I come up with for my challenge :)

There were so many cheeses I wanted to try from my book but I had to restrain myself some.  For one thing I was taking a 10 day vacation in March so I would have a short month.  Also, many of the cheeses I wanted to try were more difficult so I forced myself to start with some simple to intermediate cheeses.  I settled on a ricotta and a mozzarella.  The ricotta is considered an easy cheese and mozzarella would be an intermediate cheese.  

For some reason I decided to start with the harder of the two, the mozzarella.  I was going to make two batches.  I bought all my supplies at a local home-brewing supply store.  The quality of the milk can matter a lot for cheese but I decided to use just grocery store pasteurized / homogenized whole milk.  My first batch was kind of a disaster.  It didn't really clump together properly and then to make matters worse I managed to over-salt it.

Good thing I was planning to make two batches - at least I could get one.  For the second I watched some online videos to see what everything was supposed to look like so I would know what I was doing a little more.  Well the second batch was much better.  The mozzarella was not the easiest.     The recipes have two very exact temps to hit and maintain - not sure how exact it really has to be but I didn't want to test it too much.  The mozzarella also needs to be melted and stretched - this is a messy job.  In the end it looked and tasted like fresh mozzarella though so I was happy.

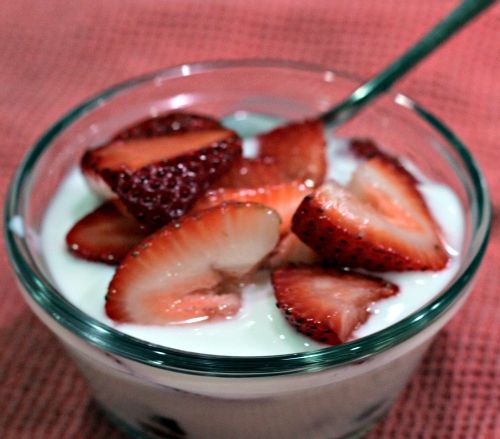
The ricotta was much easier.  You just add an acid to milk and heat it - ten drain in some cheese cloth.  Both cheeses gave me about a pound from a gallon of milk - I was kind of amazed you could get that much solid cheese from a gallon of liquid.

I ended up making some lasagna from the result.  I had never used fresh mozzarella in a lasagna but I just sliced the cheese instead of shredding it and it worked great.  Taste-wise the lasagna was much richer, mostly from the ricotta I think.  I am not really sure if it was because the ricotta was fresh or just that it was a very high fat ricotta where I would normally use a part-skim ricotta in my lasagna.

I really enjoyed the challenge and look forward to trying some of the more advanced cheeses in the book I bought.  If you are interested all the recipes I used were from that book - Artisan Cheese Making at Home: Techniques & Recipes for Mastering World-Class Cheeses.